Showing posts with label canvas. Show all posts

Jan 5, 2012

Munchkin Craft


This was fun, easy, and very cute. 
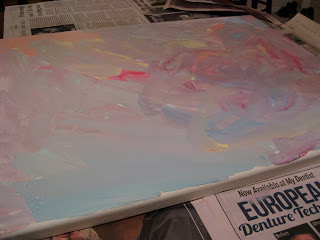
We let her pick some paint colors and told her to go nuts!
Although, she's a little bit of a neat freak...and when I say "Go Nuts" I mean that she was very apprehensive about mixing paint brushes and colors. She would stop every time she got paint on herself and ask her mommy to wipe it off. We had to coerce her into mixing things up but the end product was great.  


My parents loved the gift! Cheap, easy, and memorable! 


My sister and my 3 year old niece came to visit before Christmas! My sister has the creative gene too, so she brought a blank canvas with her for my niece to paint and give to grandma and grandpa as a Christmas Gift.

Oct 31, 2011

Thanksgiving Doilie Canvas


I was having a hard time thinking of Thanksgiving crafts. I love Halloween and Christmas so much that I often look over Thanksgiving-except the food! So I changed some "snowflake" art into fall colors and added a little "thanks". Super easy, and very pretty.

Cost: $15-- I got the paint on sale for 77 cents, and used my Michael's coupons
Difficulty level: easy, but messy


You Need:
Canvas (mine is 12x12)
Fall colored paints
Paper doilies--find them in the baking area of the craft store
Mod Podge and foam paint brush


Step One:
Paint your doilies and let them dry completely


Step Two:
Decide how you want to arrange them on your canvas, and then start Mod Podging. Apply a little to the canvas or the back of the doilie, THEN paint over the whole doilie.
Here's where it's messy-- use your fingers to make sure the edges stick down to the canvas.

Do this with all of your doilies.


Then, paint over your whole canvas with the Mod Podge to make the whole thing shiny.


I decided to add "Give Thanks" as an after thought. Do it in pencil first, then trace it with gold paint pen.                                                   

Now, decide where to put it!    


Sep 5, 2011

Kayleigh vs Crayon Art

Difficulty Level: Easy
Price: About $9 if you already have a glue gun


I first saw this awesome melted crayon art on Pinterest, and I knew I had to try it. Luckily for me, crayons were on sale at Target for back to school, so this craft ended up being SUPER cheap. Yay for budgets! Now... Here's how it's done....

Materials:
1.Crayons-- I recommend getting Crayola, they melt nicer. For the one I made, I used 46 crayons (2 pack of 24 with the browns taken out)
2.Canvas (mine is 16" by 12")-- available at Michael's for around $7
3. Hot glue gun
4. Hair dryer
5. Some newspaper to catch the melted crayon


Step 1- Line up crayons across the 16" side of the canvas in whichever order you like. (I did rainbow order with black and gray in the center)
Step 2- Hot glue them in order, with the name facing out.

Step 3- Lay out the newspaper, and stand the canvas up at a slight angle on top of the news paper.

Step 4- Turn your hair dryer on HOT and aim at the center of the crayons. They start to melt almost immediately! 


 Step 5- Let the drippings dry and cool before moving the painting. You're DONE!!

I loved doing this. Instant gratification, super cheap, and great decoration for a craft room or the classroom!


Don't wanna make it?? No problem! You can by this one in our Etsy Shop !

Winner: Kayleigh!