Showing posts with label easy. Show all posts
Showing posts with label easy. Show all posts
Feb 8, 2012
Blooming
I'm in the process of redoing my room and decided that I needed some new wall art. I found that amazing floral fabric (the background) at JoAnn's and bought all of it! The saying came from the lid of my Sweet Leaf tea. It has a little bit of an Urban Outfitters feel, and I love it. It acutally is even better in person!
To do:
*Get a large poster frame with glass
*Cut and frame your fabric
*Use vinyl stickers to create your saying on the glass ** These are Helvetica, 3 inch stickers that are available in the "Art Supply" section at Michael's (I hunted for 45 minutes!)**
Feb 7, 2012
DIY Color Blocked Spoons
Color blocking is super in-style right now, mostly for fashion. I saw something similar to these spoons online for $30 and I thought, "I can do that....and cheaper, and in better colors". I bought these wooden spoons at the dollar store. I'd recommend just painting the ones you have. (They're probably nicer, and FREE!)
Cost: Less than $5 !
Difficulty: super easy
You need:
Wooden spoon(s)
Paint and brush
Cups to dry the spoons in
Step 1:
Paint 1/2 the handle of your spoons with your fave color.
Step 2:
Let it dry upside down in a cup. (optional: add a clear coat to protect the paint while washing)
TA -DA!
This craft is so ridiculously easy that my mom actually said, "Is that it?!" Yep..that's it. Enjoy!
Labels:
cheap craft,
color blocking,
easy,
free craft,
paint,
painted spoons,
wooden spoons
Jan 31, 2012
Cutesy Felt Pouch
The inside of my purse is atrocious. Seriously... if you can put it in a purse, then I have lost it in a purse. It's full of receipts and random scribbled notes I throw in there, plus a million other mystery objects. Mary Poppins ain't got nothin' on me....
But, I digress.....
 |
This is a little felt pouch I have made to help organize my bag a little more. It could also make a cute little wallet or clutch if you have a little girl that likes to dress up!
What you'll need: 8x10" felt in multiple colors, embroidery floss, a needle, some scissors/pinking shears. The button is optional-Velcro could also work.
cost: $5
Difficulty level: easy, and it could be made easier and turned into a kid friendly craft with some fabric glue instead of a needle and thread
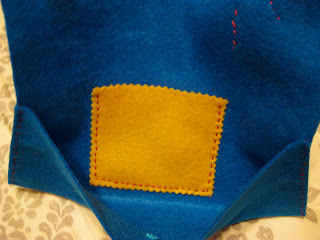
1. Cut a rectangle with pinking shears. About 3" high x 4" wide. Stitch to the very center of your felt rectangle with a running stitch.
2. Fold the bottom portion up one third. Stitch the outside edges with a running stitch.
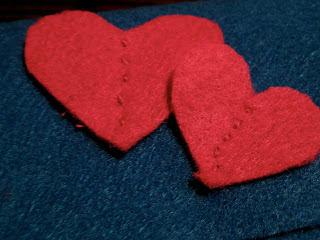
3. Cut out shapes to decorate with. I used hearts in honor of February.
4. (Optional) Sew a button to the pouch and cut a slit into the flap right about the button to create your button hole.
5. Enjoy! You can use this to hold your sunglasses, keep pens together, or even to hold your make-up. The options are endless :)
Labels:
easy,
felt,
felt pouch,
organization,
quick craft
Jan 24, 2012
Rainy Day Pick-Me-Up

I've been seeing all the fun spring trends floating around the Internet and I'm getting really excited about warm weather and bright colors. But, it's chilly and raining horribly outside tonight. I decided to add a little bit of sunshine to this gloomy evening with a yellow burst of tarty greatness by making this delicious lemon curd from kitchen confidante.
I'm definitely a novice in the kitchen, but I followed these directions with no problems at all.
What You'll Need:
3 egg yolks
1 whole egg
3/4 cup sugar
1/2 cup lemon juice
zest of 2 lemons
4 tablespoons unsalted butter, cut into small cubes
Get cookin'! One thing I've learned (and a lot of you may already know this) is that preparing everything you need first makes it way easier. For example, zest 2 of your lemons before you cut them and squeeze the juice out or you'll be left trying to zest squishy, sticky, and hollow lemon peels. SO....Lay out everything you need, zest, and THEN juice your lemons....before you even crack an egg.....
"In a small saucepan, whisk together egg yolk and egg until combines. While whisking, pour in sugar, lemon juice and zest, and continue whisking until creamy and well incorporated, about one minute. Place over medium heat, whisking constantly, until the custard thickens and can coat the back of a wooden spoon, about 8-10 minutes. Remove the pan from the heat, and stir in the butter, one cube at a time. Strain into a bowl or jar, cover surface with plastic wrap and chill in the refrigerator for at least one hour."
Thanks to Liren from Kitchen Confidante for posting this and to David Lebovitz‘s Improved Lemon Curd and Martha Stewart’s Lemon Curd, The Martha Stewart Living Cookbook (MSL Omnimedia, 2000).
Labels:
cooking,
easy,
kitchen,
lemon,
lemon curd,
Party Favors
Jan 22, 2012
Look! I finally made a "terrarium"
I bought the succulent plant at Ikea for $2!
Then I got the glass, rocks and purple moss at Michaels for about $10.
I have no idea if I planted it correctly, and I'll probably end up killing it, but I love it and it's going to look awesome on my desk tomorrow!
Jan 19, 2012
Easiest Pin Cushion Ever
I just got my first personal sewing machine the other day (YAY) and of course that means I NEEDED to get all new stuff for it, right? Well I was super tired of my tomato pin cushion from the 6th grade--you know the one. Instead of blowing all my cash on new sewing supplies, I decided to make a pin cushion for myself.
This one requires no sewing (confusing, I know), and cost me $0! My mom accidentally bought me 10 mason jar lids instead of the actual jar, so now I need to use them. Perfect solution to many issues!
Difficulty: Ridiculously easy
Cost: Free! Or less than $5 if you need a few things.
You'll Need:
A mason jar lid
A scrap of woven fabric (knits will get giant holes)
A little bit of polyfill stuffing
Step 1: (easier explained through photos)
Step 2:
Fold the corners in toward the center of the circle. Glue in place...it's easier that way.
Step 3:
Put the "ring part" of the jar lid around your little circle of batting and fabric. It should almost click into place.
Finished Product:
You can put it on the actual jar, or set it next to your machine, and I've even seen some hanging on the wall. Way cute and super easy. It took me 5 minutes.
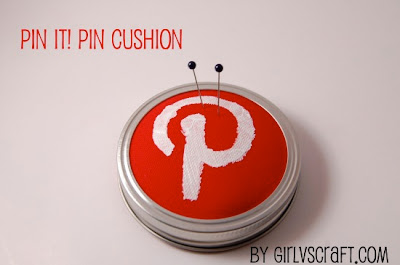
Then I got REALLY fancy... I made a stencil using freezer paper (tutorial coming soon), painted the Pinterest Logo, and made myself a "Pin It!" Pin cushion. It's a little sloppy, but it was my first try! Love it.
Labels:
cheap,
easy,
free craft,
mason jar lid,
no-sew,
pin cushion,
pins,
Pinterest Pin Cushion,
sewing crafts
Glitter Keys!
As you know, we LOVE glitter. I couldn't resist doing this to my house key the other night. It was so easy and now my key is ADORABLE (just what every boring house key dreams of being)!
Difficulty: EASY
Cost: Free if you have glitter..and who doesn't?
You'll Need:
A key (or many keys)
Mod Podge or regular glue
Glitter
Clear spray paint-- Don't skip this step!
Step 1:
Put your key on a glitter-safe surface. I use foil. Paint one side of your key with you glue.
Step 2:
Pour on the glitter! Let this side dry completely before doing the other.
Step 3:
Repeat steps one and two on the other side of your key.
GO OUTSIDE and spray both sides of you key with the clear coat. This is important! If you don't do this, glitter will fall off everywhere. Trust me, it's a mess.
Once that's dry, you're finished!
If you have lots of keys, do each one in a different color of glitter so you can ID them. Super fun!
Labels:
cheap craft,
easy,
free craft,
Glitter,
house key
Jan 5, 2012
Munchkin Craft
This was fun, easy, and very cute.
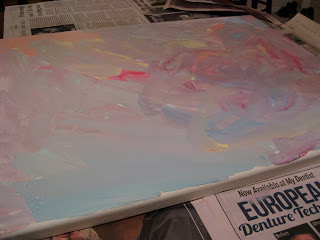
We let her pick some paint colors and told her to go nuts!
Although, she's a little bit of a neat freak...and when I say "Go Nuts" I mean that she was very apprehensive about mixing paint brushes and colors. She would stop every time she got paint on herself and ask her mommy to wipe it off. We had to coerce her into mixing things up but the end product was great.

My parents loved the gift! Cheap, easy, and memorable!
Dec 21, 2011
Christmas Tree Sweater
What do you do when you are invited to an Ugly Christmas Sweater party, but can't find an ugly sweater?!?! You PANIC!!! That's what you do.
OR, you get to crafting.
This is a super easy craft so I'm not giving you a step by step. Making a Christmas Tree Sweater involves a hot glue gun and a hand sewing needle so if you can't fill in the blanks of this incomplete how-to then we need to have a little talk...
what you'll need: felt, fabric glue, ric rac, garland, embroidery thread, etc. I also used a small tree topper, some wire, and a head band to make myself a little star hat.
cost: less than $10, but I did have to buy a sweater (Walmart) so count in $12 more.
difficulty level: easy as pie
All you have to do is make some ornaments in different sizes, colors, and patterns. I hot glued a little tree garland to the backs of a few ornaments to add some festive sparkle. Then, I used a hand sewing needle and some embroidery floss to attach them to the sweater. Just tie a little bow and you'll be able to re-wear the sweater if you want to.
Ta-Da! You now have yourself a not so ugly Christmas sweater. You're actually pretty darn cute! ;)
PS. My apologies for the grainy photos... some of these came from my super awesome iPhone (still the 3G...).
OR, you get to crafting.
This is a super easy craft so I'm not giving you a step by step. Making a Christmas Tree Sweater involves a hot glue gun and a hand sewing needle so if you can't fill in the blanks of this incomplete how-to then we need to have a little talk...
what you'll need: felt, fabric glue, ric rac, garland, embroidery thread, etc. I also used a small tree topper, some wire, and a head band to make myself a little star hat.
cost: less than $10, but I did have to buy a sweater (Walmart) so count in $12 more.
difficulty level: easy as pie
All you have to do is make some ornaments in different sizes, colors, and patterns. I hot glued a little tree garland to the backs of a few ornaments to add some festive sparkle. Then, I used a hand sewing needle and some embroidery floss to attach them to the sweater. Just tie a little bow and you'll be able to re-wear the sweater if you want to.
Ta-Da! You now have yourself a not so ugly Christmas sweater. You're actually pretty darn cute! ;)
Labels:
christmas sweater,
christmas tree,
easy,
felt,
ornaments
Dec 20, 2011
Glitter Wine Bottles
what you'll need: a couple wine bottles, some glitter, glue, and a sponge brush.
cost: not counting the wine-these are relatively cheap/free if you've done basically any of the other crafts on this blog... we really like glitter...
difficulty level: easy
Let it dry a little and brush off the excess glitter.
repeat!
I put long taper candles in the wine bottles first, but I don't know how I feel about them.
So, I also tried it out as a vase with some of the extra berry things I have from my tree.
Dec 19, 2011
Crafting at Work; Part 2
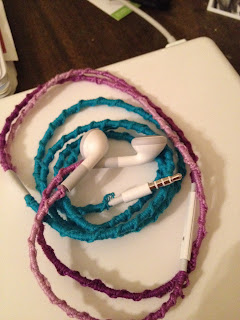
Embroidery Thread Wrapped Headphones
I saw this cool craft all over Pinterest, but none of the photos had a tutorial. So I figured it out for you! You're welcome...
The best part-- your cords won't tangle anymore!!!
 |
| GirlvsCraft.com |
You'll need:
Your headphones
16 yards TOTAL of embroidery floss. (8 yards for the top 2 strands, and 8 yards for the bottom)
Scissors
This link on how to do the Chinese Staircase Knot that wraps the cord:: http://www.wikihow.com/Make-the-Chinese-Staircase-Bracelet
PATIENCE-- This took me 4 hours
*Start by tying your thread at the top of your headphone.(#2)
*Then begin the wrapping technique found in the link. It's super, super easy. Don't make this harder than it is ;) (#3 and #4)
* Keep on wrapping until you cover the entire cord. Tie off with a double knot at the end.
Advice...when people ask how you did it, send them here so they can do it themselves. I got suckered into doing another for a co-worker for a grand total of 8 hours of wrapping cord!
Subscribe to:
Posts (Atom)


